OSS
- 创建一个存储桶,最好国内的,访问速度快一点。
- 开启传输加速服务。
CDN
- 配置一个域名指向 OSS 源站。
- HTTPS 有免费证书不花钱就申请下吧,申请后记得设置强制跳转 HTTP -> HTTPS。
- OSS 的读写权限是私有,需要去回源配置把阿里云OSS私有Bucket回源开起来。
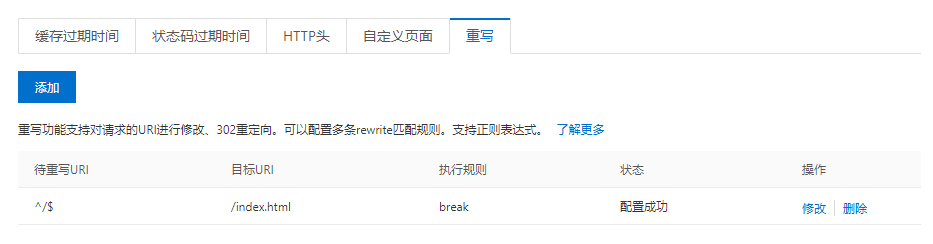
- 前往缓存配置设置 URL 重写。
GitHub
- Settings -> Secrets 配置下环境变量。
1
2
3
| SecretId= # SecretId
SecretKey= # SecretKey
Bucket= # 存储桶
|
- 创建部署文件。
.github/workflows/main.yml
1
2
3
4
5
6
7
8
9
10
11
12
13
14
15
16
17
18
19
20
21
22
23
24
25
26
27
28
29
30
31
32
33
34
35
36
37
38
39
40
41
42
43
44
45
46
47
48
49
50
51
52
53
| name: Deploy Vue
on:
push:
branches:
- master
jobs:
deploy:
runs-on: ubuntu-latest
steps:
- uses: actions/checkout@master
- uses: actions/cache@v1
with:
path: ~/.npm
key: ${{ runner.os }}-node-${{ hashFiles('**/package-lock.json') }}
restore-keys: |
${{ runner.os }}-node-
- name: Use Node.js
uses: actions/setup-node@v1
with:
node-version: '13.x'
registry-url: 'https://registry.npmjs.org'
- name: Npm Install
run: |
npm install @vue/cli
npm install -d
- name: Build
run: |
./node_modules/.bin/vue-cli-service build
- name: AWS CLI Config Init
run: |
mkdir -p ~/.aws
touch ~/.aws/config
echo "[default]
s3 =
addressing_style = virtual" > ~/.aws/config
touch ~/.aws/credentials
echo "[default]
aws_access_key_id=${{ secrets.SecretId }}
aws_secret_access_key=${{ secrets.SecretKey }}" > ~/.aws/credentials
- name: AWS CLI Upload
run: |
aws s3 sync dist s3://${{ secrets.Bucket }} \
--no-progress \
--follow-symlinks \
--size-only \
--delete \
--endpoint-url=https://oss-accelerate.aliyuncs.com
- name: AWS CLI Config Clear
run: |
cat /dev/null > ~/.aws/config
cat /dev/null > ~/.aws/credentials
|
部署脚本需要根据自己程序自行调整。
测试